Adding a virtual asset
The Forecast section of the Origin app can be used to add a virtual asset to an existing forecast. You can determine the asset properties using different fields available.
How to add a virtual asset
-
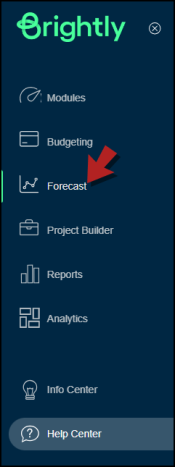
Go to the Forecast section by clicking on Forecast from the left navigation panel.
-
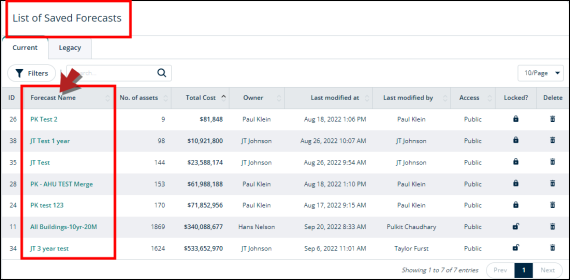
Here, you'll see a List of Saved Forecasts.
-
In the Forecast Name column, click on the forecast that you want to add the virtual asset to.
-
You'll be directed to the page containing this forecast's details.
-
Keep scrolling down to the end of this page and select the required year tab.
-
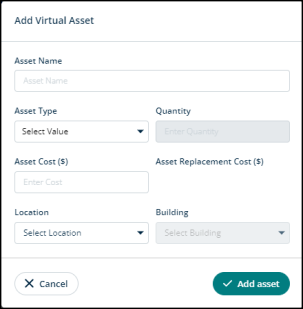
Click on the + Virtual Asset button on the right side.

-
A modal will open.
-
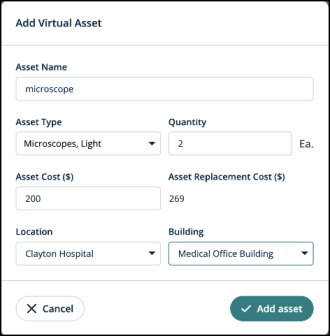
In the Asset Name field, type in the name of the asset that you’re adding.
-
In the Asset Type field, click on the Select Value drop-down to select the asset’s type. For example, if it’s a cooling unit, or a device of sorts. You’ll find various categories here to choose from.
-
In the Quantity field, type in the number of assets. For example, you’re adding 3 microscopes.
-
In the Asset Cost field, enter the cost of this asset.
-
Once you provide the information about the asset type and its quantity, the information in Asset Cost and Asset Replacement Cost fields will automatically get populated.
-
In the Location field, click on the Select Location drop-down to see all the facilities you have added to this account. Select the one that you want to add the asset to.
-
In the Building field, click on the Select Building drop-down to see the buildings of this facility. Choose the one where you want to add the asset.
-
Click on Add asset to proceed or hit Cancel to go back.
Sample
-
Check out this sample for adding a virtual asset.